Counting a Serialized Item
When you count an item that requires a serial number, you must enter a unique serial number for each item in the physical count.
Note: Inventory Preference settings facilitate the physical count process by setting a default quantity and by defaulting to the last location during the physical count session; see "User Preferences".
- From the Main form, tap the Inventory option.
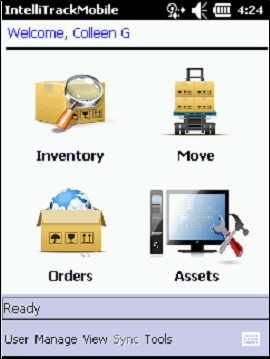
- The Inventory - Consumables form appears.
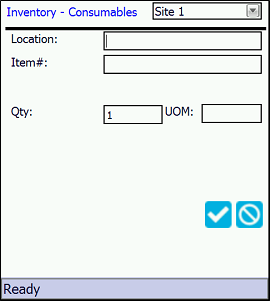
- The default site of the logged-in user is automatically entered in the site field at the top of the form. If you need to select another site, enter the inventory counting site in the Site field via the selections available in the drop-down list (the site or sites available depend on the sites assigned to the logged-in user).
- Location field: enter the location where the item is being counted in this field.
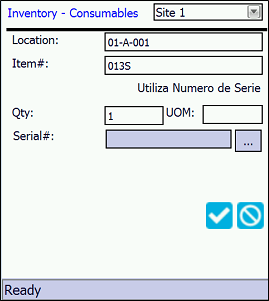
- Item# field: enter the item number (entering the alternate item number will also display the item number) that is being counted in this field. If this item is serialized, a serial number field appears onscreen after the item is validated.
- Enter a count amount in the Qty field. (If using the default quantity inventory preference setting, the Qty field will default to the default inventory quantity; see "User Preferences".)
- A unique serial number is required for each item in the count. To enter a serial number for the inventory, select the Browse button in the Serial # field.

- The Enter Serial Numbers form appears.
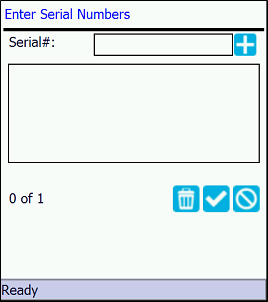
- Scan or enter a serial number it in the Serial No field for each item in the count.
- Select the Add icon
 to add the serial number to the item count.
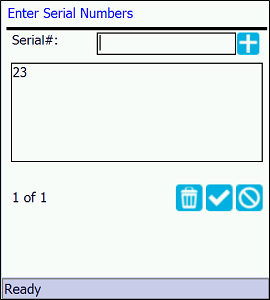
- To remove a specific serial number from the list, select it and then select the Delete
 icon.
icon. - When all serial numbers have been added for the count, select the Save icon
 to save the serial numbers to this inventory count.
 - To cancel adding these serial numbers, select the Cancel
 icon.
icon. - The Enter Serial Number Numbers form closes and you are returned to the Physical Count form.

- The Serial# field shows that a serial number has been entered for the item quantity being counted.
- If this division uses multiple units of measure, the UOM field is visible in the form and you must enter a unit of measure in the UOM field.
- Click the Save icon to save these items to inventory. (Click the Cancel icon to cancel saving these items to inventory.)
- The form clears, indicating that the item has been saved to inventory. (If the default last location setting is being used, the Location field does not clear. If the default quantity setting is being used, the Qty field contains the default quantity. For more information, see "User Preferences".)
-
IntelliTrack Mobile RF: If you are operating in RF Mode, the inventory count is immediately added to the main database.
- IntelliTrack Mobile Batch: If you are operating in batch mode, the inventory count is placed in the upload table and will be integrated into the main database after the data is uploaded to the workstation-computer and processed into the main database.
- When you are finished at the Physical Count form, click the Cancel icon to close the form and return to the Main form.